Introduction
3D printing is a revolutionary technology and has become the most popular way to create models and prototypes. It allows you to design your own 3D models, which can then be printed out on a 3D printer. There are a number of different types of 3D printers available for purchase, but they all work in a similar way: by creating layers of material (usually plastic) that build up over time into an object with height and depth. While there are many different materials that can be used for this process, from paper to clay and even metal (yes!), the most common material used by hobbyists is PLA plastic filament because it’s inexpensive and easy to use.
In our quest to find the most cost-effective way into the hobby, we’ll only consider PLA printers. PLA requires one of the lowest extruder and bed temperatures, making it one of the most forgiving materials to print with. While PLA is not the strongest material available, it offers quite a bit of strength then one would think. If you are looking to print in a stronger material, reinforced PLA and Carbon Fiber may be right for you, however, they are much more expensive than plain PLA.
Of course, printers capable of printing hotter temperatures will have more requirements and will inevitably cost more. For getting started on a budget, we’ll focus on printers that can scale up to handle more intense materials but have a low-entry cost.
Amazon Disclosure
R U Coding Me LLC is a participant in the Amazon Services LLC Associates Program, an affiliate advertising program designed to provide a way for websites to earn advertising revenues by advertising and linking to Amazon.com or .ca, .co.uk, etc.
Select a 3D printer
There are SEVERAL great companies out there that make great entry level printers. In general, you should consider the following:
– Select a 3D printer with a large build volume.
– Look for a printer with a heated bed.
– Look for an LCD display on your 3D printer, and make sure it has an SD card slot if you want to print without being connected to the internet.
– Make sure your 3D printer comes with good warranty coverage and customer service options, since they’re going to be important if anything goes wrong while using your device!
These are more readily available but still offer room to grow should you want to upgrade later down the road. If you have more room in the budget, you should also consider factors like ready out of box, filtered enclosure and high print speeds. These are not necessarily required when you are 3D printing on a budget, but are nice quality of life upgrades you will appreciate after printing for a while. Below are some of our recommended printers if you are starting on a budget:
Ender 3 Series
The Ender 3 is a great entry level printer with an expanded build plate size for larger projects. With the original Ender 3 coming in at less than $200, this platform offers many opportunities to expand later on in the future. This printer will require assembly, but this will give you a great opportunity to learn more about your printer.
While we are trying to print on a budget, there is one upgrade we absolutely see as necessary with this printer. The stock Ender 3 is one of the nosiest printers out there! This is due to the basic controller included in the printer. If you upgrade to the v2, it will ship with an upgraded 32-bit controller already installed.
While the original Ender 3 is a very capable printer, you will find yourself looking for an upgraded board after you print a couple times. Trust me, just get the v2 and you’ll hardly even know it’s running.
On the upper end of the spectrum, the Ender 3 S1 Pro will have everything you need to print advanced materials like carbon fiber and polycarbonate reinforced filaments right out of the gate. You will need to consider a heated enclosure and HEPA filter if you print with smelly materials like ABS, ASA or polycarbonate. If you want a printer that is ready right out of the gate (assembly still required), we recommend you check out the S1 Pro.
Overall, the Ender 3 will require time and patience to get set up. There are many ways you can upgrade it to fit your specific needs and budget, but there is a reason why this printer is considered the gold standard to entry level printers.
FlashForge Adventurer Series
The FlashForge Adventurer 3 is a great entry level option that is advertised as ready out of the box, with the cheapest one coming in at $300. At this price level, you receive an enclosed printer capable of printing PLA and its derivatives, however, you can invest in the upgraded Adventurer 3 models to print more advanced materials like PETG with the included 265 C rated extruder.
The Adventurer 4 is a more expensive option in their lineup, but it includes a massively expanded build area, included 265 C rated extruder and a built-in heated storage for materials like Nylon that are particularly sensitive to humidity.
One factor to consider with high temperature filaments like polycarbonate is the ability to print large parts. While the FlashForge 4 has a massive printing area, some report issues with large polycarbonate prints.
If you are not anticipating high temperature filaments, this should not be a concern to worry about. My only remark for the Adventurer Series is the difficulty in upgrading your printer after purchase. The printer is entirely enclosed and optimized to work with the parts included. Modifications can be made, however, they may require more time and patience to complete.
Buy 3D printing filaments
Now that you have a printer, let’s talk about filament! Most 3D printer manufacturers will also have a PLA that they sell with your printer. This PLA is optimized to work with your printer well, however, there are several other flavors of PLA from 3rd party companies.
3D printing filaments come in different colors and materials, some of which are flexible, some rigid. You can buy both online or at a local store. For our purposes, we’ll only consider PLA from the following companies:
Keep in mind
There are many great PLA manufacturers that are not listed in this review. These are companies I have tested for personal projects. When experimenting with filaments, buy a spool and see how well it works for your printer before you stock up on a filament.
PolyMaker
PolyMaker is renowned for their quality filaments and is one of the major producers of 3D printing filaments. They offer a wide line of filaments, ranging from PLA to PLA Pro that are ready to print on any 3D printer.
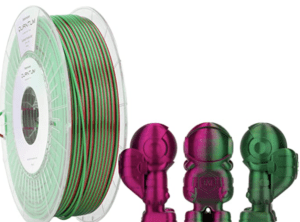
MatterHackers
MatterHackers makes one of the coolest gradient filaments that is unlike anything else I’ve seen! It is more expensive but is definitely worth the price if you are printing figurines or parts that need a cool finish.
HatchBox
I started printing with HatchBox’s regular PLA and it works great on the Ender 3 system. I have zero complaints and it works great for all of my generic projects.
I noticed a couple of blobs that get generated, but it’s better than under extrusion. A little bit of sand paper or a file will quickly fix the couple of blobs from the finish.
Duramic
For prints that require more durability, I’ve found myself using Duramic’s PLA+ for its affordability and durability. The spools I’ve received are great quality and get the job done.
eSun
Another great filament to consider for durability is eSun’s PLA+, with a wide range of colors and overall great durability. I have not personally tested eSun’s durability but several colleagues send me videos of them dropping prints from 6+ ft with no damage. I think I will grab a spool and test it for myself!
Clean your printer
Once you’ve built your printer, you will need to clean your 3D printer each time (or weekly) before you print. Your printer can have dust and debris buildup that will cause issues when you try to print. To clean the printer:
- If you use hairspray, glue stick, etc. you’ll want to wipe down the bed with rubbing alcohol to remove the sticky material from your bed.
- Remove any dust or debris from the bed of your printer with a soft cloth.
- Use a damp cloth to clean the print bed and wipe down any excess water using another dry cloth.
Every now and then (monthly), it’s a good idea to inspect the moving parts of the printer for dust build ups. Keeping this clean will help improve the quality of your prints.
Calibrate your printer
This part is a part that most of us skip in the initial process because printing with thermoplastics is cool!! However, this step is crucial for producing dimensionally accurate parts and prints that do not fail very often.
You’ll need to level your bed often and calibrate your settings anytime you take apart your extruder or print bed.
Level your bed
The first thing you need to do is check whether or not your printer’s bed is level. To do this, turn on the machine and wait for it to reach its normal operating temperature (about 10 minutes). Then place a sheet of paper at each corner of your glass surface and gently adjust them until they are all at roughly the same height above said surface. Your goal here is not perfection; just make sure they’re close enough that when they come in contact with each other while printing.
To validate this, you can print a bed level test. This file will most likely fail, but we want to see how well it is leveled. If you find that no filament is coming out/scraping the nozzle, your bed is too close to the bed and you will need to create more room. If your filament does not stick to the bed, your nozzle is too high and must be lowered for the filament to stick.
In general, the paper test is a great way to ensure your nozzle is at the same height at each point on the bed, but individual corners may be lower or higher than others. Once you get the hang of it, bed leveling will become very easy.
To get the ultimate performance, an auto-leveler will adjust the printer to dynamically accommodate for bed inconsistencies. However, you’ll still have to level the bed, but your prints will be very crisp!
Calibrate with software
NOTE: You will only need to recalibrate your printer if you disassemble any axes or adjust the extruder.
To calibrate your extruder, you can disconnect the filament tube from the extruder and feed filament into the gears of your extruder base. Mark the beginning piece of filament and extrude 100mm of filament from your printer’s command (or send gcode to do this). Afterwards, mark the ending piece and measure the distance to assess how much filament was extruded. It should be 100mm, but this may differ. All3DP has a great guide on the entire calibration process.
To calibrate your printer, I like to ensure the dimensional accuracy of your stepper motors before printing anything too crazy. This file is a 20mm cube that is frequently used to assess the printing quality of the printer. You can download and slice this file onto your printer. With a digital caliper, you can measure the cube on each side (X, Y, Z). On the Thingiverse page, it will tell you how to calculate the value for your steps to properly tune the printer:
if:
e= expected dimension
o = observed dimension
s = current number of steps per mm

then:

(e/o) x s = your new number of steps per mm
Once you make the adjustments on your printer, you can reprint another test cube and obtain the final result.
Once you have your printer properly calibrated, it’s time to start printing!
Slicing Models From Thingiverse
While you don’t need programming experience to work with a slicer, it helps to understand how the gcode is generated. In short, STL files are vector mesh drawings you can print out. However, each printer is different and requires unique instructions to process. A slicer program like Cura will compile STL files to fit onto your specific printer, much like a C compiler will compile code to run on your computer.
Once you install a slicer program, spend some time setting up the correct settings that match your printer. Cura has a very straightforward setup and is compatible with most printers. You’ll need to slice the bed level and cube calibration files before you can start printing other larger files.
Learn CAD Software
Now that you have a printer ready to go, you should invest some time into learning CAD software. This will allow you to print out your own files! There are several tools out there, but one great free option is FreeCAD. It is entirely open source and is packed with many features. This can be overwhelming for newcomers to CAD, so be sure to follow tutorials and get comfortable with the software before trying your hand at designing parts entirely from scratch.
Once you have your model, you can export the file as an STL (stereolithography) or GCODE (gcode) file — these are the two most common types of files used by 3D printers. STL files work great with Cura, but you may be able to expore directly as gcode or step files. For ease of use, start with STL exports.
The CAD community is a rapidly growing, friendly network of likeminded individuals. Be sure to ask lots of questions along the way as there are several others that have probably been in your shoes!
3D Printing Checklist
Now that you are an avid 3D printing specialist, it’s time to go over your pre-printing check list!
- Clean your printer.
- Remove residue on printer bed
- Inspect wheels/moving parts for dust and debris
- Level the bed.
- Paper test your printer
- Print out a test bed print and make any find adjustments as needed
- Slice your files and print with dialed-in settings.
- Load in your STL file and slice your part with the correct settings.
- If experimenting with your part, be sure to save your original settings so you can always go back if needed.
- Check online resources for more information on 3D printing techniques and troubleshooting problems.
Conclusion
You can start 3D printing in no time! 3D printing is a lot of fun, especially when you have a well-dialed machine that will do what you want. Be sure to spend time adjusting your settings for the 3D printer and any PLA filaments you choose. Each filament can behave differently, so it’s important to find out what settings will work best on smaller prints so you do not waste any filament.
No printer is truly ready out of the box. There will be a learning curve involved, however, it is important to get over this curve as soon as you can so that you can make the most of your printer!
As you grow in the hobby, you can always upgrade your printer to accommodate new materials and more. One of the best aspects is the ability to print your own upgrades! Not only will you be able to customize your printer, but you won’t have to spend anymore money on upgrades… yet.
Hopefully you found this post helpful and/or interesting! If so, be sure to share it with someone who may be interested in 3D printing! Be sure to comment your coolest 3D printing project.

Founder and CEO of R U Coding Me LLC. Jacob obtained his Bachelor’s of Computer Science at the University of Central Florida. He likes to go to the gym and teach people about technology.